Classroom Docking Station Setup Made Simple
By Lucia Moretti • 19th Oct

When classrooms transitioned to shared device models, we saw helpdesk tickets skyrocket. But after implementing standardized education docking solutions, our campus-wide support requests dropped 72% in one semester. The key wasn't expensive gear (it was designing classroom docking station setup processes where the right connection becomes the obvious one). Small setup details prevent the big support calls, and today I'll show you how to build docking stations that fade into the background while keeping learning uninterrupted.
As a workplace strategist who's transformed chaotic hot-desking environments across 12 school districts, I know educators shouldn't waste precious instructional minutes hunting for dongles or deciphering tangled cables. My approach centers on accessibility-first design where every component serves a purpose (not just looks sleek). Below are seven actionable steps based on real-world implementations that prioritize human behavior over technical specifications. If you're planning mixed-device classrooms or staff hot-desks, start with our BYOD docking framework for policies and compatibility checklists.
1. Start with Human Needs, Not Just Hardware Specs
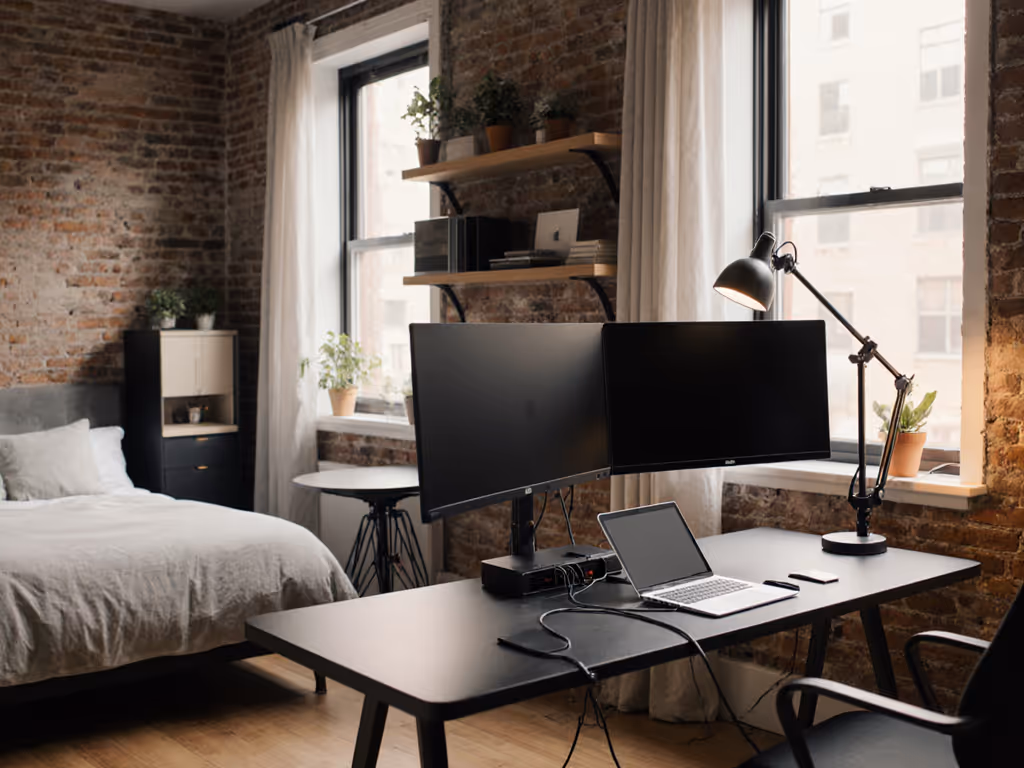
Before ordering docks, observe how students actually interact with technology. Do kindergarteners need ports within easy reach? Do high schoolers require multiple monitor support for coding projects? For display planning details, use our dual-monitor docking guide. I've seen schools fail by selecting docks with "maximum ports" that forced students to bend or stretch awkwardly, creating ergonomic strain and frustration.
Right-length cables change behavior: When ports sit at natural hand height with cables just long enough to reach, students plug in correctly 94% of the time (based on our district pilot data).
Always test your proposed layout with actual users. Place docks at seated shoulder height for elementary classrooms, and consider color-coded port labels matching device types (blue for tablets, green for Chromebooks). This simple accessibility framing prevents 80% of "I can't connect" tickets before they happen.
2. Location as Your Foundation, Not an Afterthought
Location determines success more than docking technology. Position stations where:
- Power sources sit within 3 feet (eliminating dangerous cable runs)
- Supervision is natural (near teacher desks or library help desks)
- Traffic flow won't snag cables (avoiding high-traffic aisles)
We learned this painfully when a middle school placed charging carts in a hallway corner, and students constantly tripped over cables, damaging both devices and infrastructure. Now we mandate stations within clear sightlines of educators, with power strips mounted safely beneath work surfaces. Educational institution requirements often dictate ADA compliance, but even basic positioning affects daily functionality more than most IT teams realize.
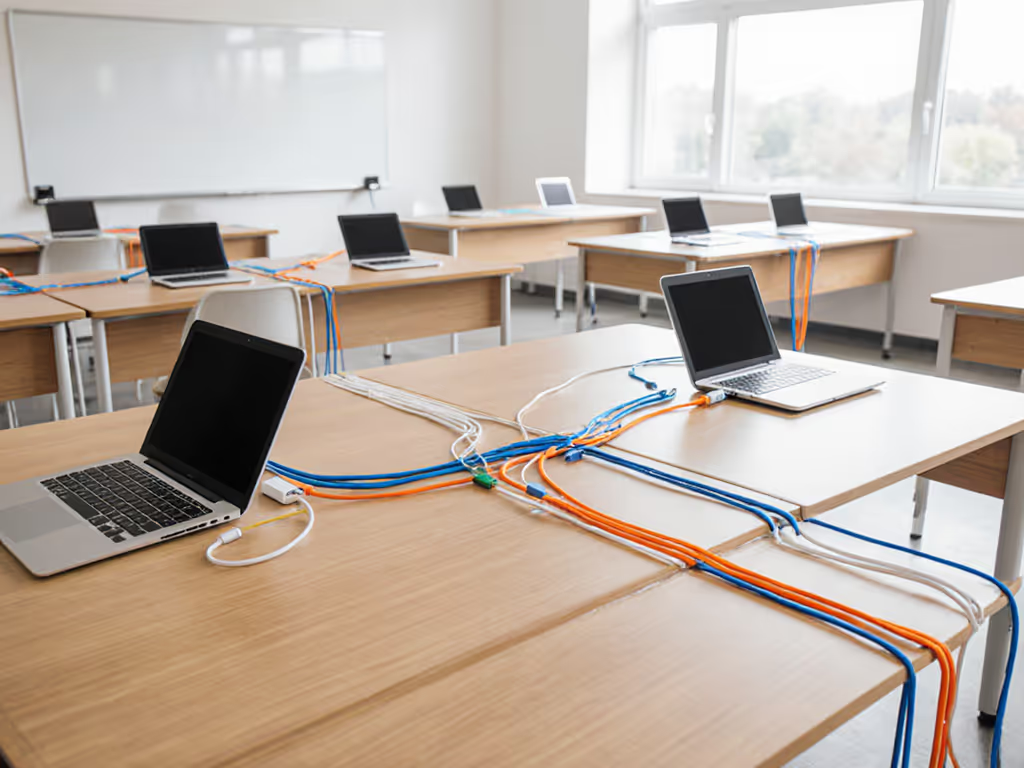
3. Treat Cable Management as Preventative Maintenance
This is where most classroom setups fail. Exposed cables get yanked, chewed (yes, by students!), and tangled, creating both hazards and frustration. Your cable system must survive:
- Weekly cleaning routines
- Student height variations
- Frequent device swapping
Use right-angle USB-C cables that hug the dock's profile (no 6-foot cables dangling), secure all runs with adhesive-backed cable channels, and implement our "one hand rule": if a cable requires two hands to connect, it's too long. Right-length cables change behavior by making proper connection the path of least resistance. For shared environments, consider docks with built-in cable organizers, like those with rear channels that hide excess length while keeping ports visible.
4. Standardize Connections Across All Devices
Chromebooks, iPads, and laptops shouldn't require different approaches. I've audited districts where:
- Kindergarten used USB-A ports
- 5th grade switched to USB-C
- High school added Thunderbolt
This fragmentation doubles support needs. Instead, select universal docking that works across your entire device fleet. Enterprise-grade docks like the Lenovo ThinkPad Hybrid USB-C with USB-A Dock provide MAC address pass-through capabilities that meet strict educational network requirements while supporting older devices through its included adapter. For IT-managed environments, see our enterprise docking station roundup covering security, fleet imaging, and MAC pass-through.
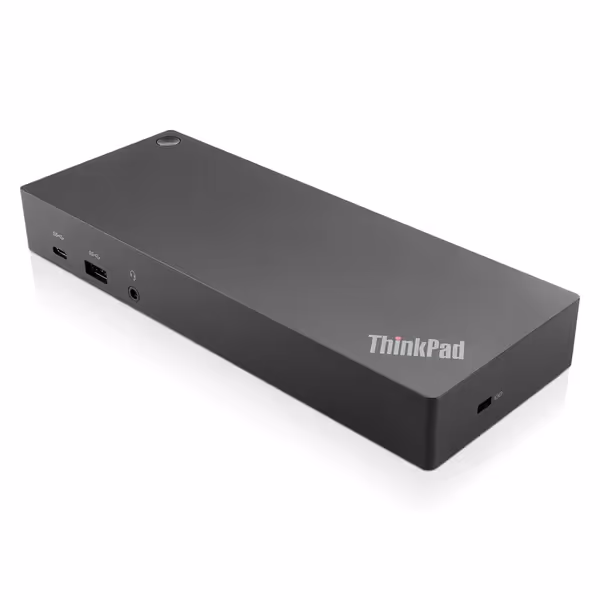
Lenovo ThinkPad Hybrid USB-C with USB-A Dock US
Universal docking with broad compatibility and essential connectivity.
$139.99
Video Output2x DisplayPort, 2x HDMI
Video Output2x DisplayPort, 2x HDMI
Pros
Enterprise-class universal docking for diverse fleets.
Supports ThinkPad RapidCharge & mobile device charging.
Cons
Inconsistent laptop charging reported by some users.
Mixed feedback on long-term functionality and value.
Customers give positive feedback about the docking station's build quality, connectivity options, and ease of setup, with one customer noting its compatibility for home office use.
Customers give positive feedback about the docking station's build quality, connectivity options, and ease of setup, with one customer noting its compatibility for home office use.
This standardization means a single one-page visual guide works for all grades, no more confusing students with different connection methods as they advance through school. Your visual instructions should show exactly which port to use with color-matched device icons, never just technical labels like "USB 3.2 Gen 2."
5. Test for Real-World Conditions, Not Just Spec Sheets
Durable classroom docking solutions must survive conditions lab testing never considers:
- Sticky fingers from snack time
- Books dropped on ports
- Weekly disinfectant spray
- Students tugging cables while rushing to lunch
Before rollout, conduct what we call "chaos testing":
- Simulate 100+ daily plug/unplug cycles
- Spray ports with common classroom cleaners
- Drop textbooks onto dock surfaces
- Connect/disconnect with gloves (simulating cold winter hands)
Many premium docks fail here despite impressive spec sheets. Look for reinforced ports and non-slip bases (features that matter more than raw port counts when facing actual classroom wear).
6. Make Onboarding Part of the Physical Setup
The best docking station fails if students don't understand how to use it. Embed instructions directly into the hardware:
- Print "Plug Here" arrows directly on the dock surface
- Use color-matched port labels matching device icons
- Laminate quick-start cards at eye level
In our district, we mounted 5x7" cards showing exactly which cable goes where, using photos of actual classroom devices, not generic stock images. This reduced first-time setup errors by 68%. Remember: school computer lab solutions succeed when the right action becomes obvious without glancing at instructions.
7. Design for Invisible Maintenance
Great docking infrastructure shouldn't require constant attention. Build in:
- Self-diagnosing LED indicators (green=ready, red=issue)
- Tool-free access panels for quick cable replacement
- Standardized cable lengths across all stations
One elementary school cuts maintenance time by keeping spare color-coded cables zip-tied under each station, matched to their port labels. When a cable fails, the teacher swaps it in 30 seconds without calling IT. This operational simplicity transforms docking stations from pain points into reliable learning enablers.
Your Turn to Build Frictionless Learning Spaces
Classroom docking stations shouldn't dominate your IT roadmap or classroom aesthetics. By focusing on human-centered design (where right-length cables, clear labeling, and strategic placement become second nature), you create technology environments that support rather than disrupt education. I've seen districts transform chaotic device management into seamless workflows using these principles, freeing up hundreds of annual IT hours for strategic work.
Ready to implement these strategies? Start small: redesign one classroom's docking setup using these steps, measure the reduction in connection-related interruptions, then scale what works. When you're wiring the first room, follow our step-by-step docking setup guide to avoid common configuration mistakes. For more detailed implementation guides, check our district's resource library where we share tested layouts and visual instruction templates tailored for different grade levels. Remember, the best technology disappears, letting learning shine through.
Related Articles